1) Add The New Template File
The first step in this process is to create the new PHTML template file. You don’t need to develop the template yet. Just create an empty placeholder or copy and rename an existing file.
The important thing is to save your new PHTML template file to app > design > frontend > default > modern > template > page, wherein “default” is the name of the package and “modern” is the name of the template. If your package was named “Fred” and your theme was called “Astaire,” the path would be app > design > frontend > Fred > Astaire > template > page.
2) Mirror the Core File Structure in Local
From a development standpoint, one of Magento’s best features is its ability to mirror core files. In this way, you can make changes to what are clearly core functions or files without worrying about future updates erasing those changes or breaking your site.
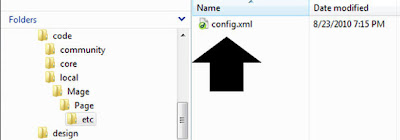
Navigate to app > code > local. Create a new folder called “Mage.” Inside of the “Mage” folder, create a new folder named “Page.” Open “Page” and create a folder called “etc.” In this way, you will have mimicked the folder structure of one portion of the Magento core.
Get a copy of config.xml
Now open config.xml
Add the following code under <layout> tag:-
<twelve_columns module="page" translate="label">
<template>page/12columns.phtml</template>
<layout_handle>page_12_columns</layout_handle>
</twelve_columns>
4) Update Mage_All.xml
I need to update MageAll.xml_, which can be found at app > etc > modules.
In this file, I need to locate the “Mage_Page” module. It will look like the following code.
- <Mage_Page>
- <active>true</active>
- <codePool>core</codePool>
- <depends>
- <Mage_Core/>
- </depends>
- </Mage_Page>
Between the “codePool” tags, I need to change “core” to “local.”
- <Mage_Page>
- <active>true</active>
- <codePool>local</codePool>
- <depends>
- <Mage_Core/>
- </depends>
- </Mage_Page>


No comments:
Post a Comment